Remove the trial watermark
PhotonCam lets you try every feature without a subscription. The only restriction is that compressed photos saved in HEIF or JPEG include a trial watermark.
DNG files never include a watermark, so you can use manual adjustments to capture DNG-only photos completely free.
If you want to remove the watermark after you subscribe, set up one of the following capture workflows in advance.
The key is to save multiple versions of each photo. Choose one of these options:
- Enable RAW and keep both DNG and HEIF/JPEG in a single photo.
- Enable the “Non-destructive Save” feature.
Here’s how to configure each option.
Setup before capturing
Enable DNG + HEIF/JPEG
In the Capture & Process settings page:
- Choose a RAW format (BayerRAW or ProRAW).
- Turn on “Keep DNG”.
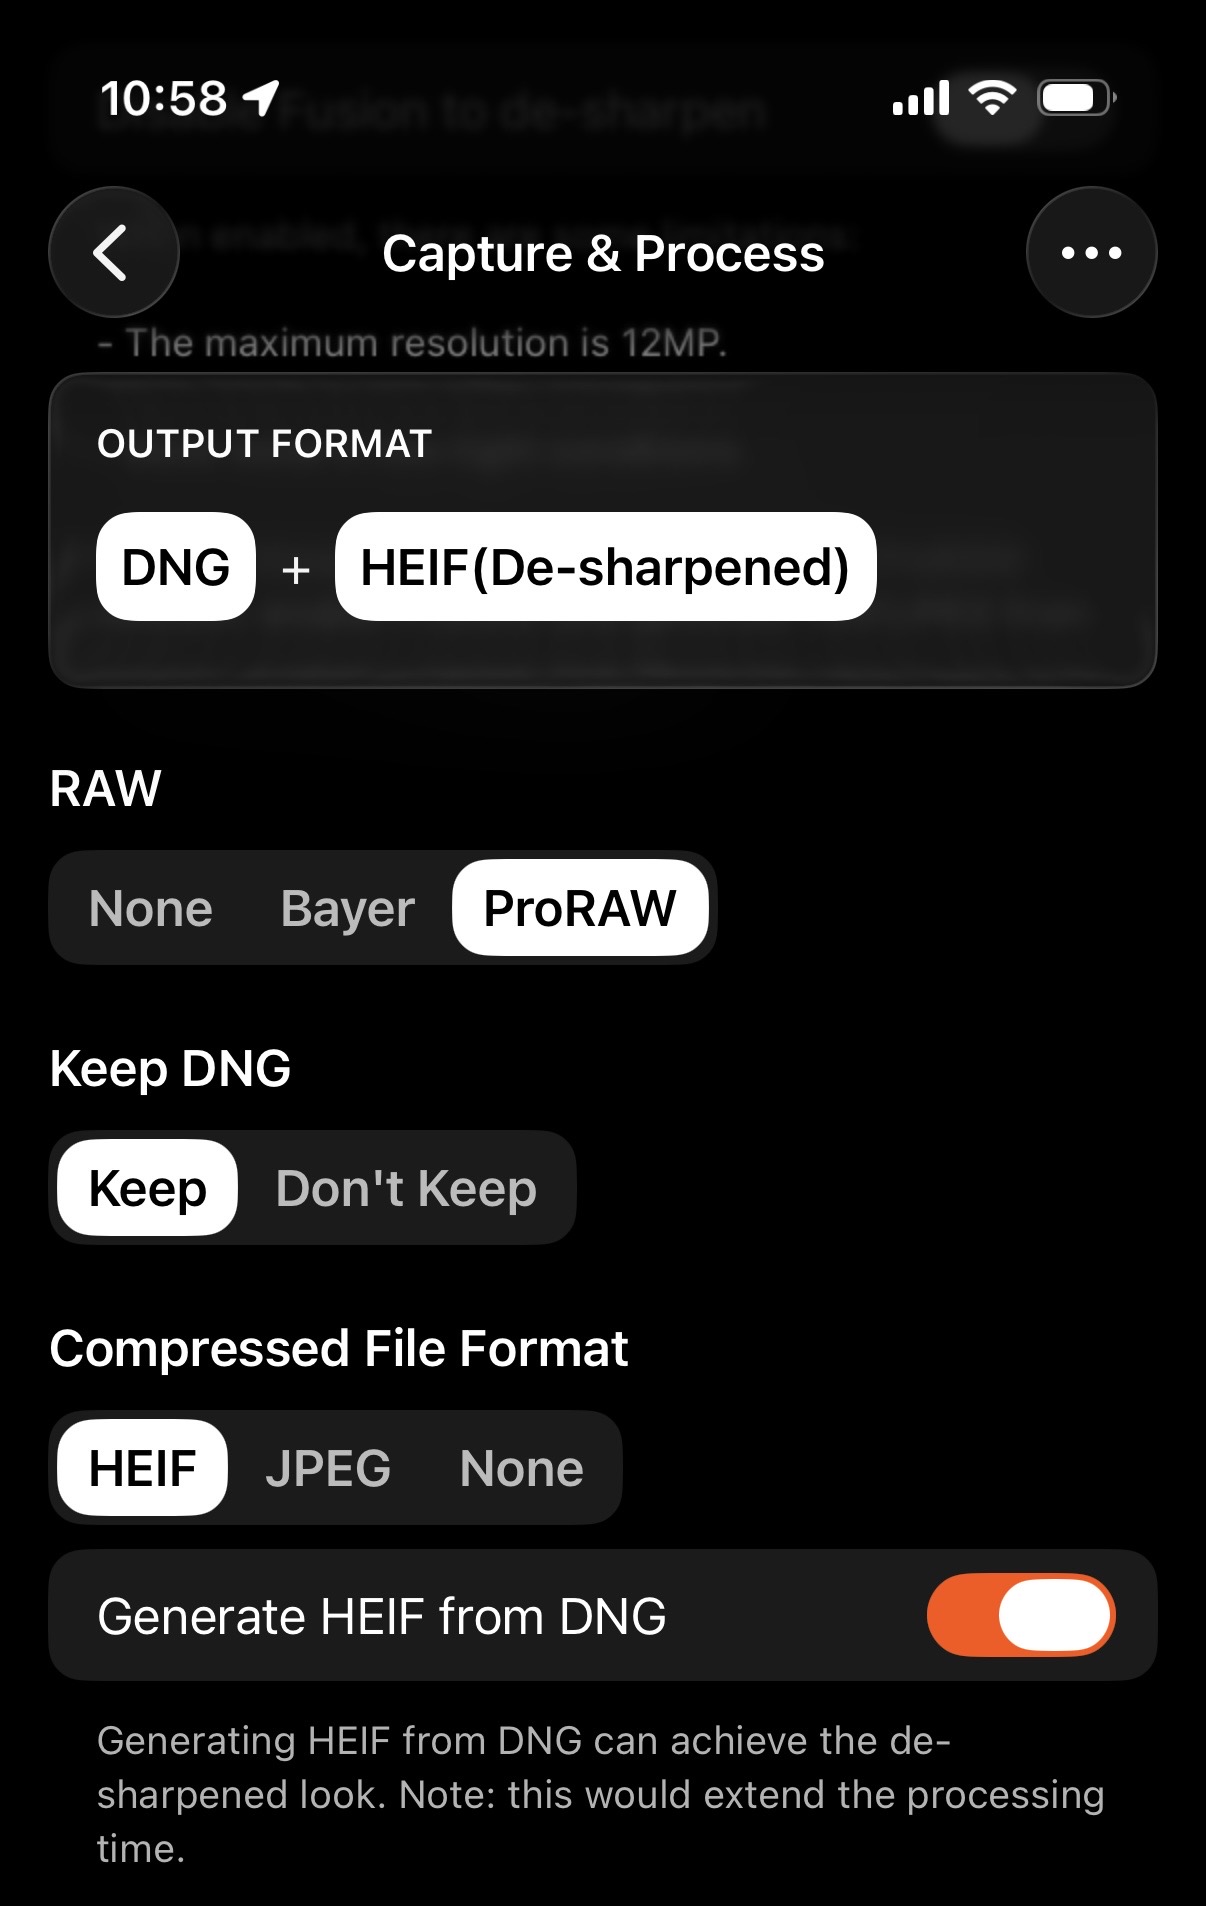
When you capture a photo, both HEIF/JPEG and DNG versions will be saved in a single photo asset in the iOS Photos app.
Enable “Non-destructive Save”
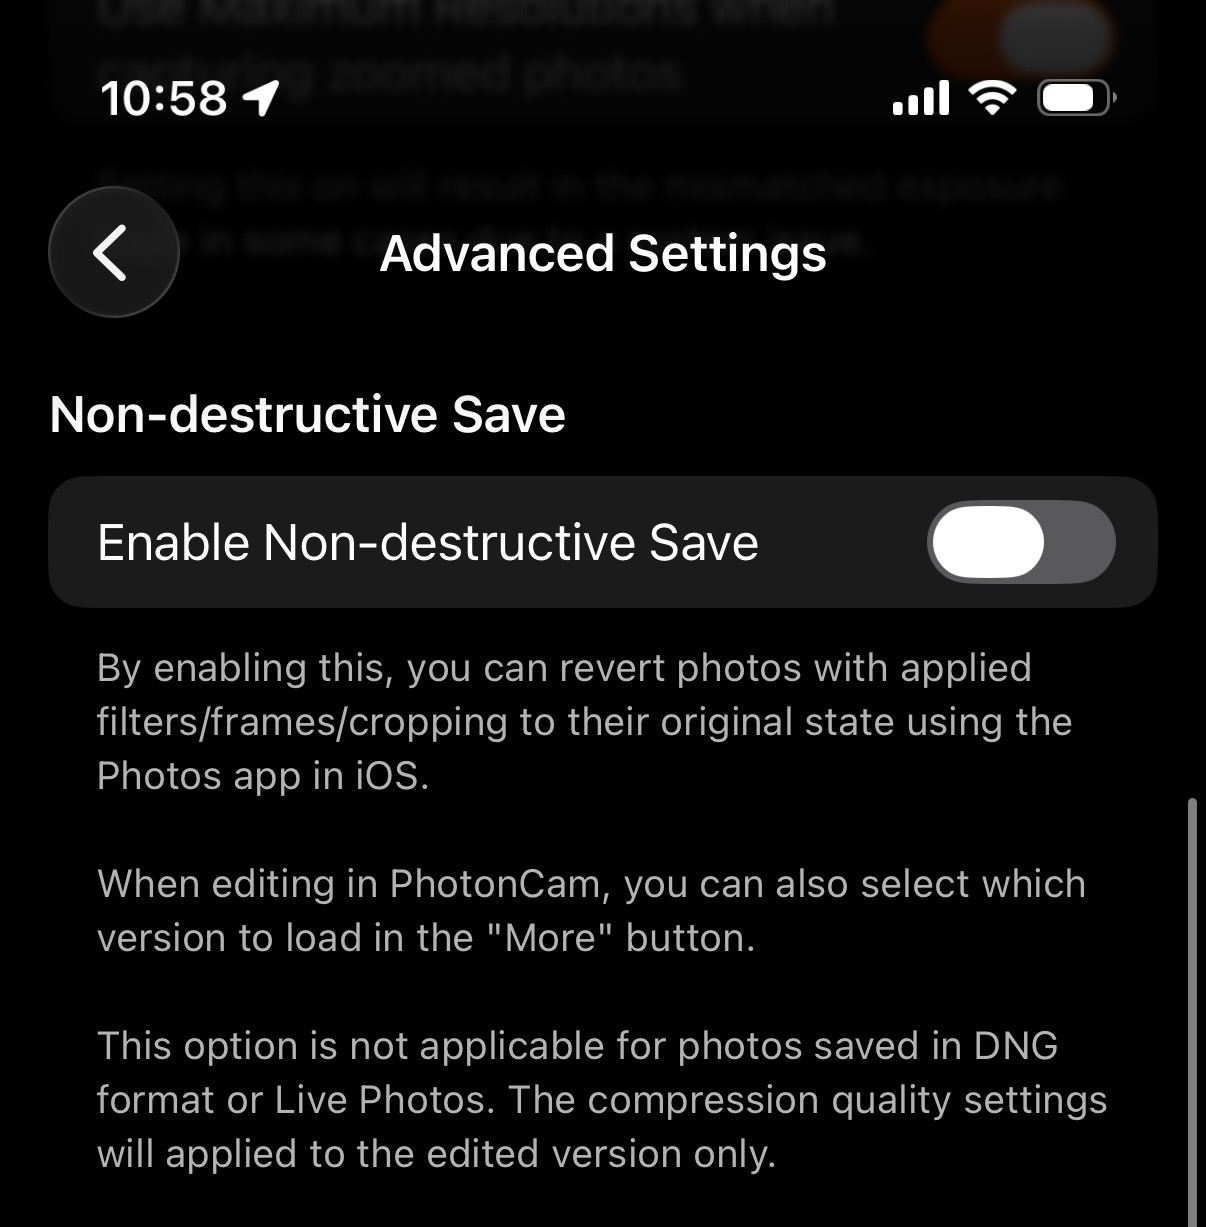
Go to Settings → Capture & Process → Advanced Settings, then enable the “Non-destructive Save” toggle.
With this option, even if you save only compressed formats (HEIF/JPEG), two versions of the photo are stored in the Photos app:
- The original.
- The edited version with your filters and the trial watermark.
Remove the watermark after purchasing
Thank you for purchasing and supporting PhotonCam!
Once you have configured one of the capture setups above, you can remove the watermark in any of these ways:
- Edit the photos in the PhotonCam editor. By default, it opens the Original version, which has no watermark. Saving immediately keeps the photo watermark-free.
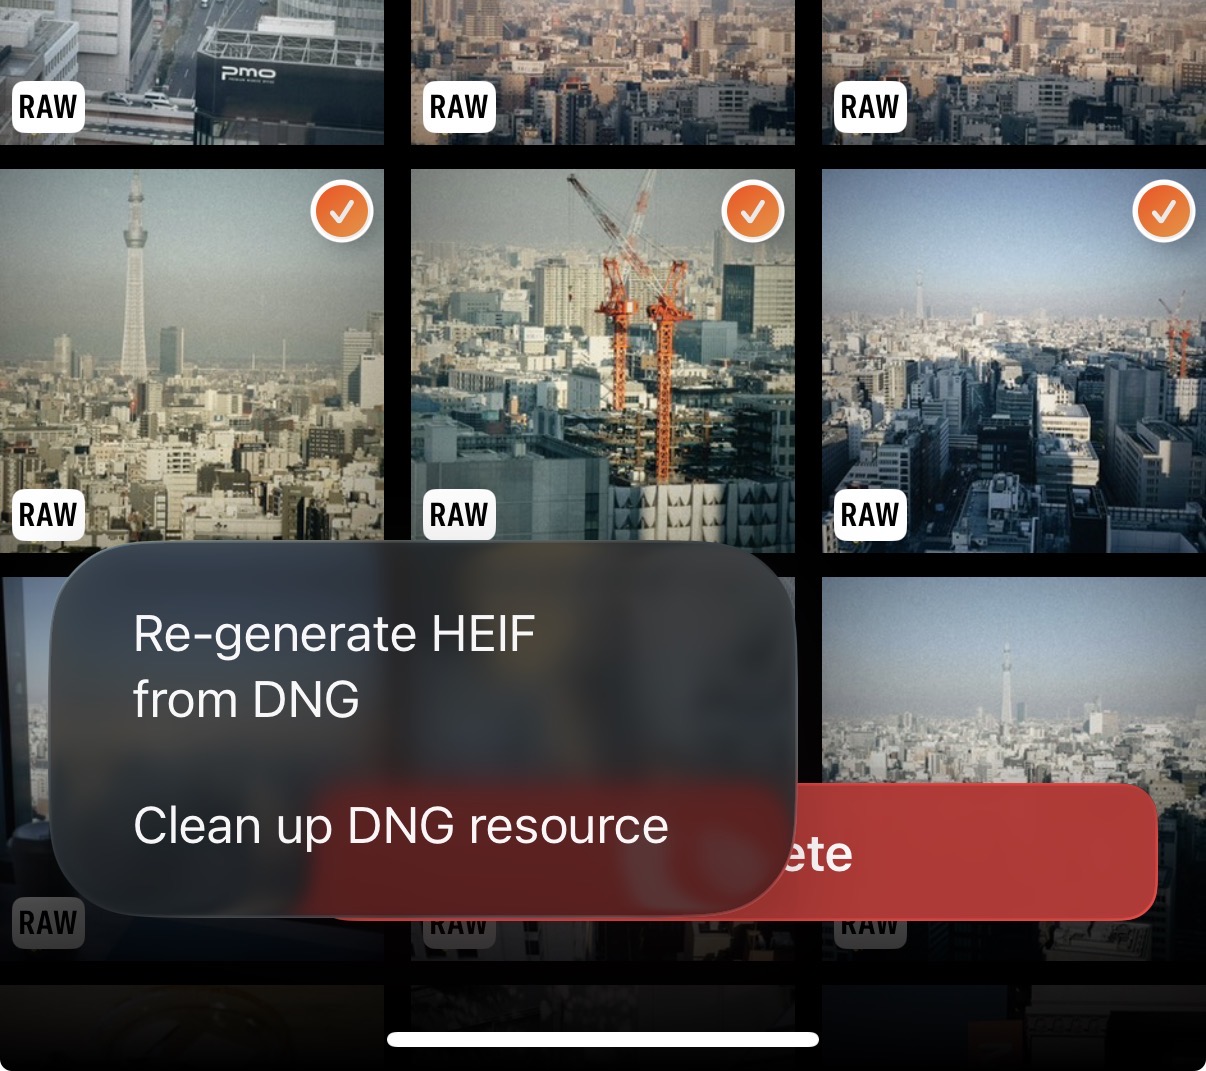
- For RAW + HEIF/JPEG photos, open the PhotonCam gallery, multi-select photos with the RAW badge, then use the “Re-generate HEIF from DNG” option in the bottom “…” menu.
- For photos saved with Non-destructive Save, simply re-edit and save them again in the PhotonCam editor.