Capture, view and edit HDR photos
Starting with version 1.14.2, PhotonCam now fully supports capturing, viewing, and editing HDR photos on your iPhone, iPad, and Mac.
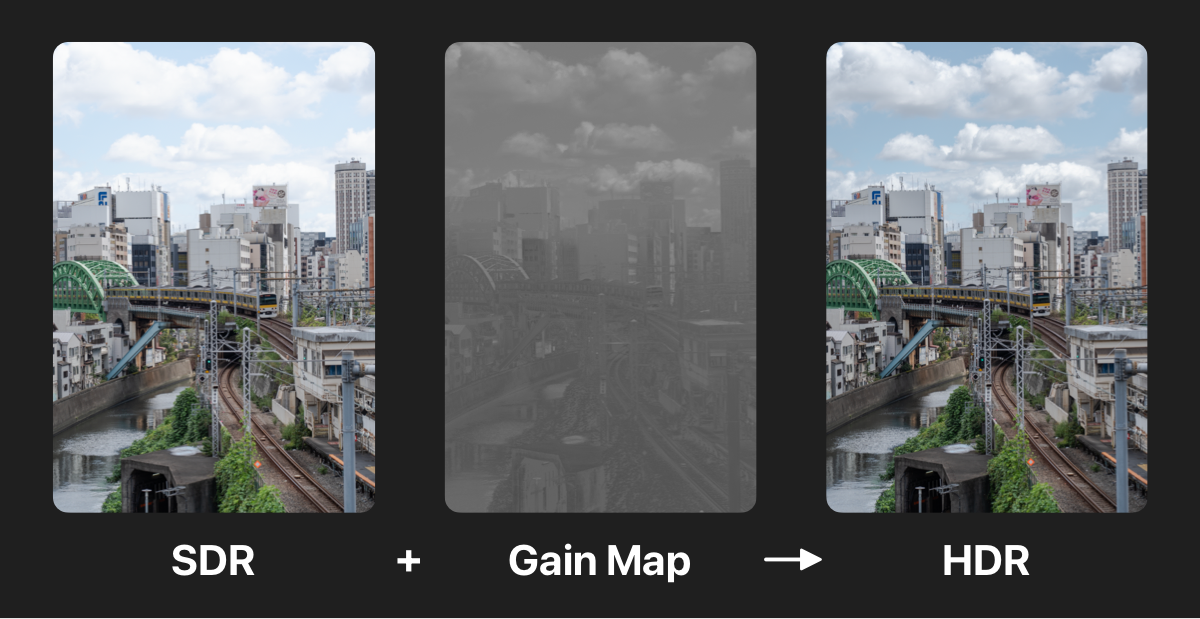
PhotonCam leverages Apple’s HDR Gain Map technology to capture and save HDR photo files. These photos, while captured in HDR, will be rendered in SDR format in Display P3 color space, along with the Gain Map metadata in one HEIF/JPEG file.
This technology ensures that the photo file can be displayed correctly and visually appealing on both SDR and HDR-compatible devices and apps. For instance, if an app lacks the capability to show HDR content, it will only display the SDR portion of the photo.
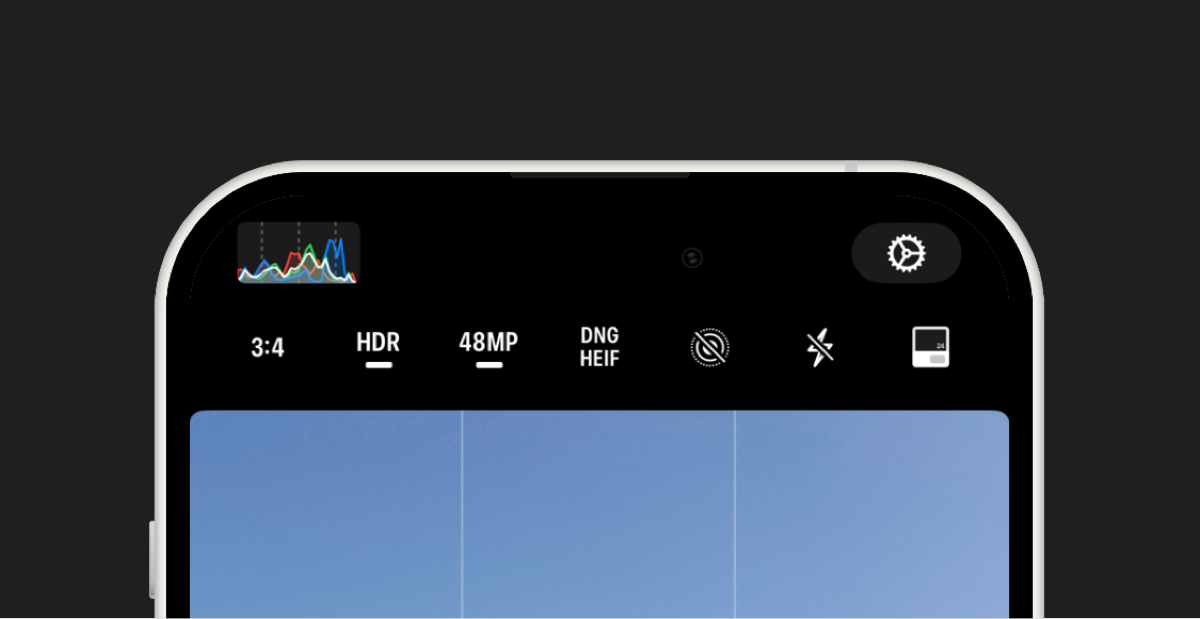
Capture HDR photos
PhotonCam, by default, captures and saves HDR photos. To toggle this feature, you can find the toggle in the top toolbar. There are a few things to be noticed when it comes to other features in PhotonCam:
- When saving photos with Frame, only the actual photo content will have HDR effect, while the frame border will appear to be in SDR. You can find a toggle in the settings to disable HDR when capturing photos with Frame.
- The video in Live Photo doesn’t support HDR.
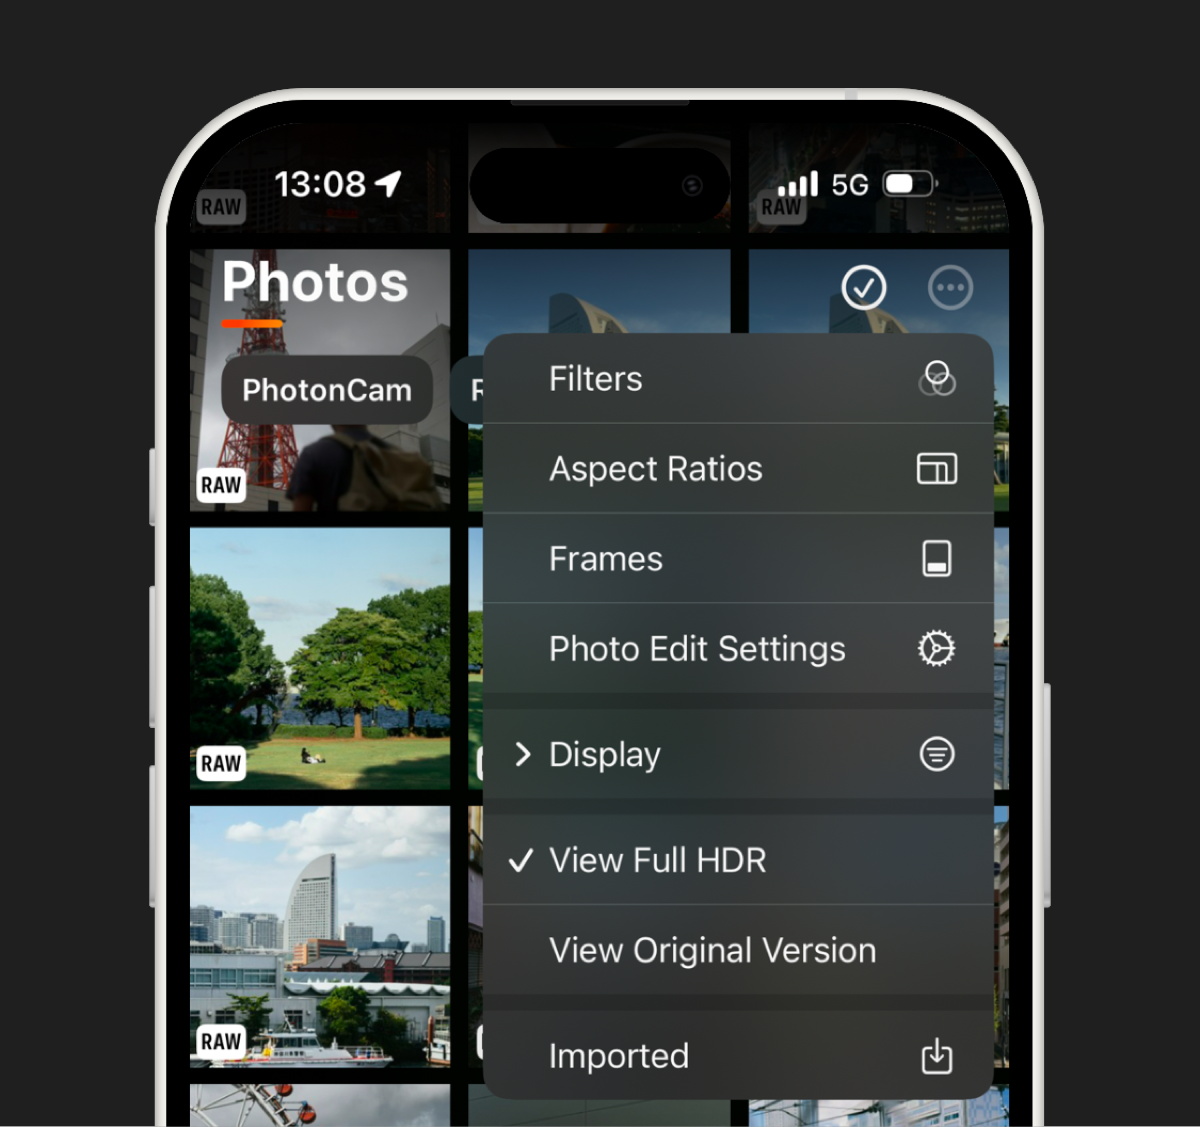
View HDR photos
PhotonCam supports viewing photos with HDR effect in iOS 18.0 or later. By default, this toggle is off. You can turn it on in the upper “...” menu on the gallery page.
Edit HDR photos
When you select a photo to edit in PhotonCam, HDR-specific features can be found in the HDR tab. PhotonCam supports 3 types of HDR editing:
- HDR Photos captured by PhotonCam or other HDR-supported apps like the iOS Camera app. Both ProRAW and HEIF/JPEG formats are supported.
- Bayer RAW files captured by non-iPhone cameras like Sony Alpha series. Those RAW normally have high dynamic range, thus a gain map can be calculated. This section only supports iOS 18.0 or later.
- For SDR photos, PhotonCam can help “generate” a HDR Gain Map for you to “simulate” the HDR effect. Although it’s a simulation based on the SDR content, the saved photos will also appear stunning when viewed in HDR.
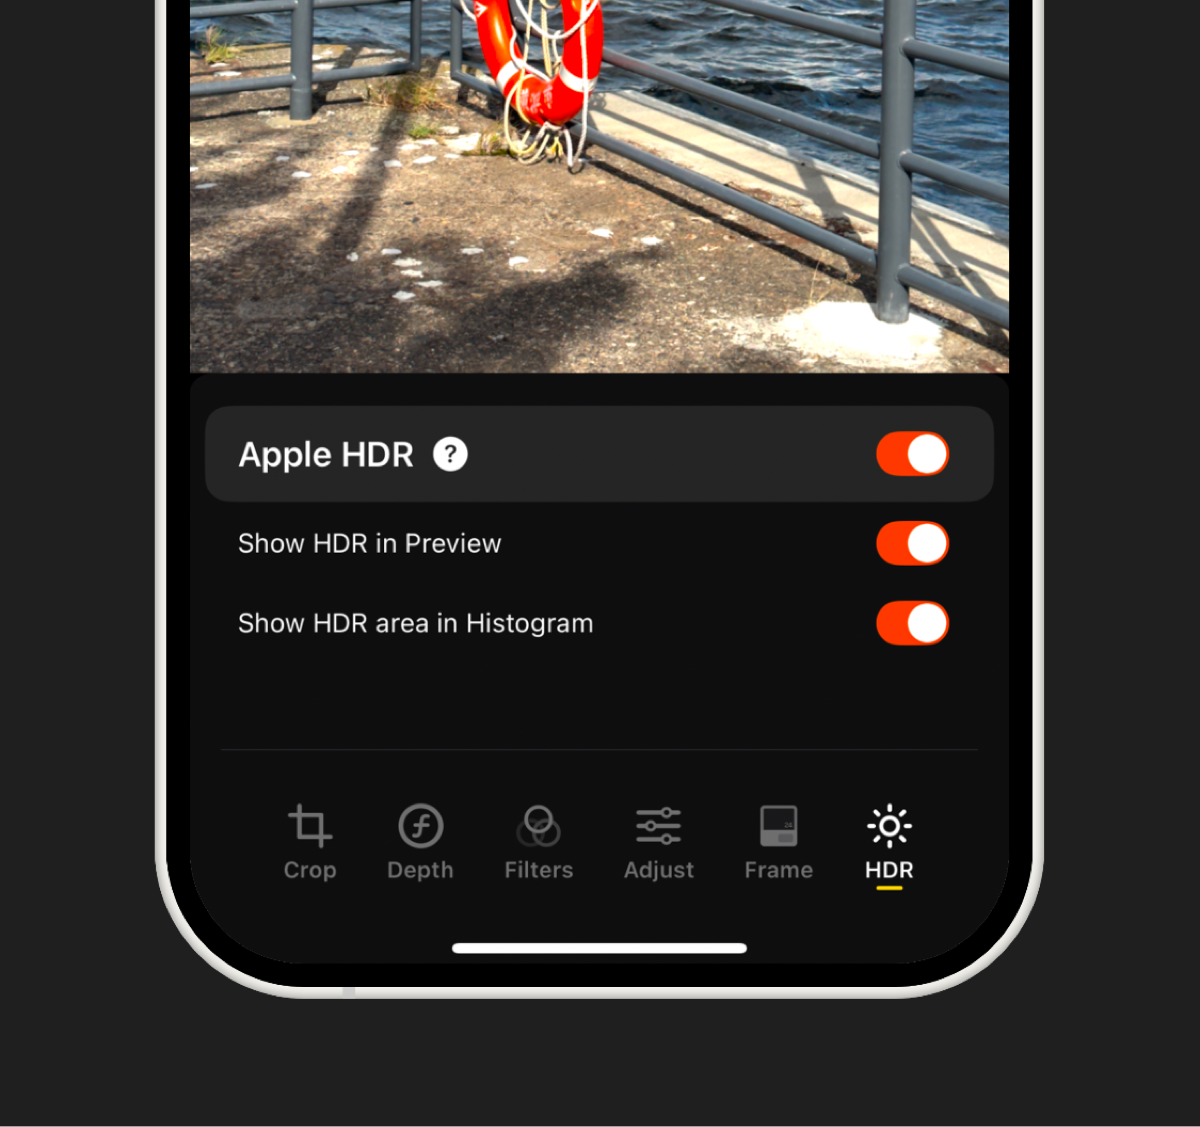
In the HDR tab, you can:
- Toggle to turn the HDR on or off. When this toggle is on, the saved photos will be HDR photos. Note: as described above, those will be SDR + Gain Map format.
- By default, the editor’s preview won’t show HDR effect. You can turn this toggle on to view HDR effect in the editor.
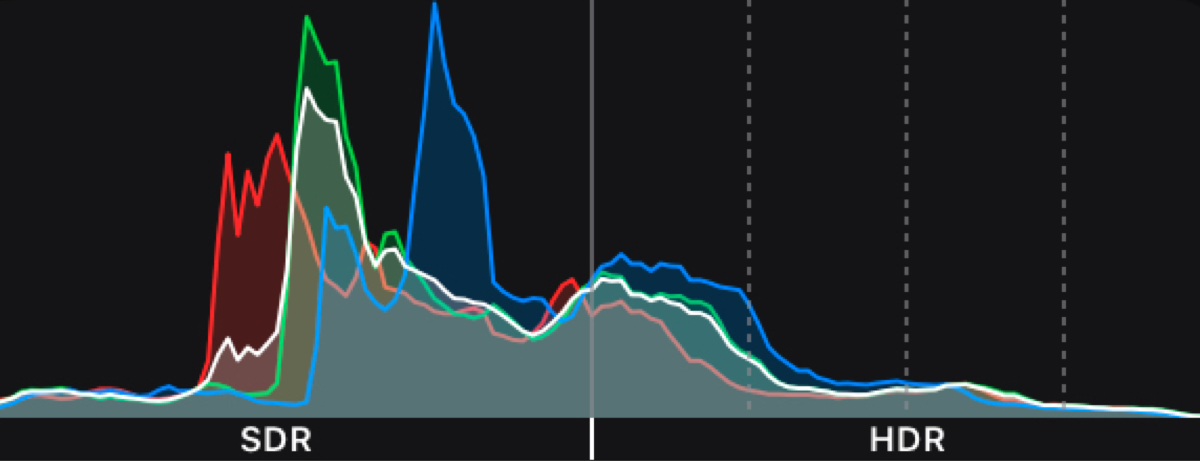
- Histogram can also show HDR content. When this toggle is on, any pixels that have a greater value than the standard dynamic range white will be binned in the HDR section.
Some tips when editing HDR photos:
- Be sure to keep most of the pixels inside the standard dynamic range. If you adjust the exposure or brightness too much to the HDR part, the result’s SDR rendition will still be clipped to the SDR white, resulting in a bad appearance when viewing in SDR mode. You can utilize the histogram to help you with this.
- You can individually choose to show the RGBL channels in the histogram to fit your needs.
- When your device is in low-power mode, the HDR effect will automatically be turned off.
- Some devices like the iPhone SE and iPad with LCD can show limited HDR effects. To fully view HDR effects, iPhone 12 and later, iPad with MiniLED or OLED, and Mac with XDR display are recommended.
- There aren’t many social apps that support showing HDR effects. Instagram is the popular one. You can try posting HDR photos on Instagram to view them in HDR effect. Of course, the iOS/macOS’s Photos app fully supports showing HDR effects.