iOS Photo Storage Model and Camera Processing Settings
Despite PhotonCam being a professional photography app, in most cases, using the default shooting settings can achieve very good results. If you have higher requirements for post-shooting photo processing, you can set it up on the "Camera Processing Settings" page in the settings.
PhotonCam offers a variety of camera processing settings, which can generally be divided into the following aspects:
- What parameters to use for shooting?
- In what format and parameters should the photos be stored after shooting?
The following text will first introduce in detail the photo storage model of the iOS system. After gaining a certain understanding of the photo storage model, it will then introduce several camera processing settings of PhotonCam.
Of course, the content below may be somewhat difficult to understand for those who are not tech enthusiasts. If you don't want to delve into it, that's okay. But I still highly recommend that friends who have some understanding of technology or digital products continue reading.
The Photo Storage Model of the iOS System
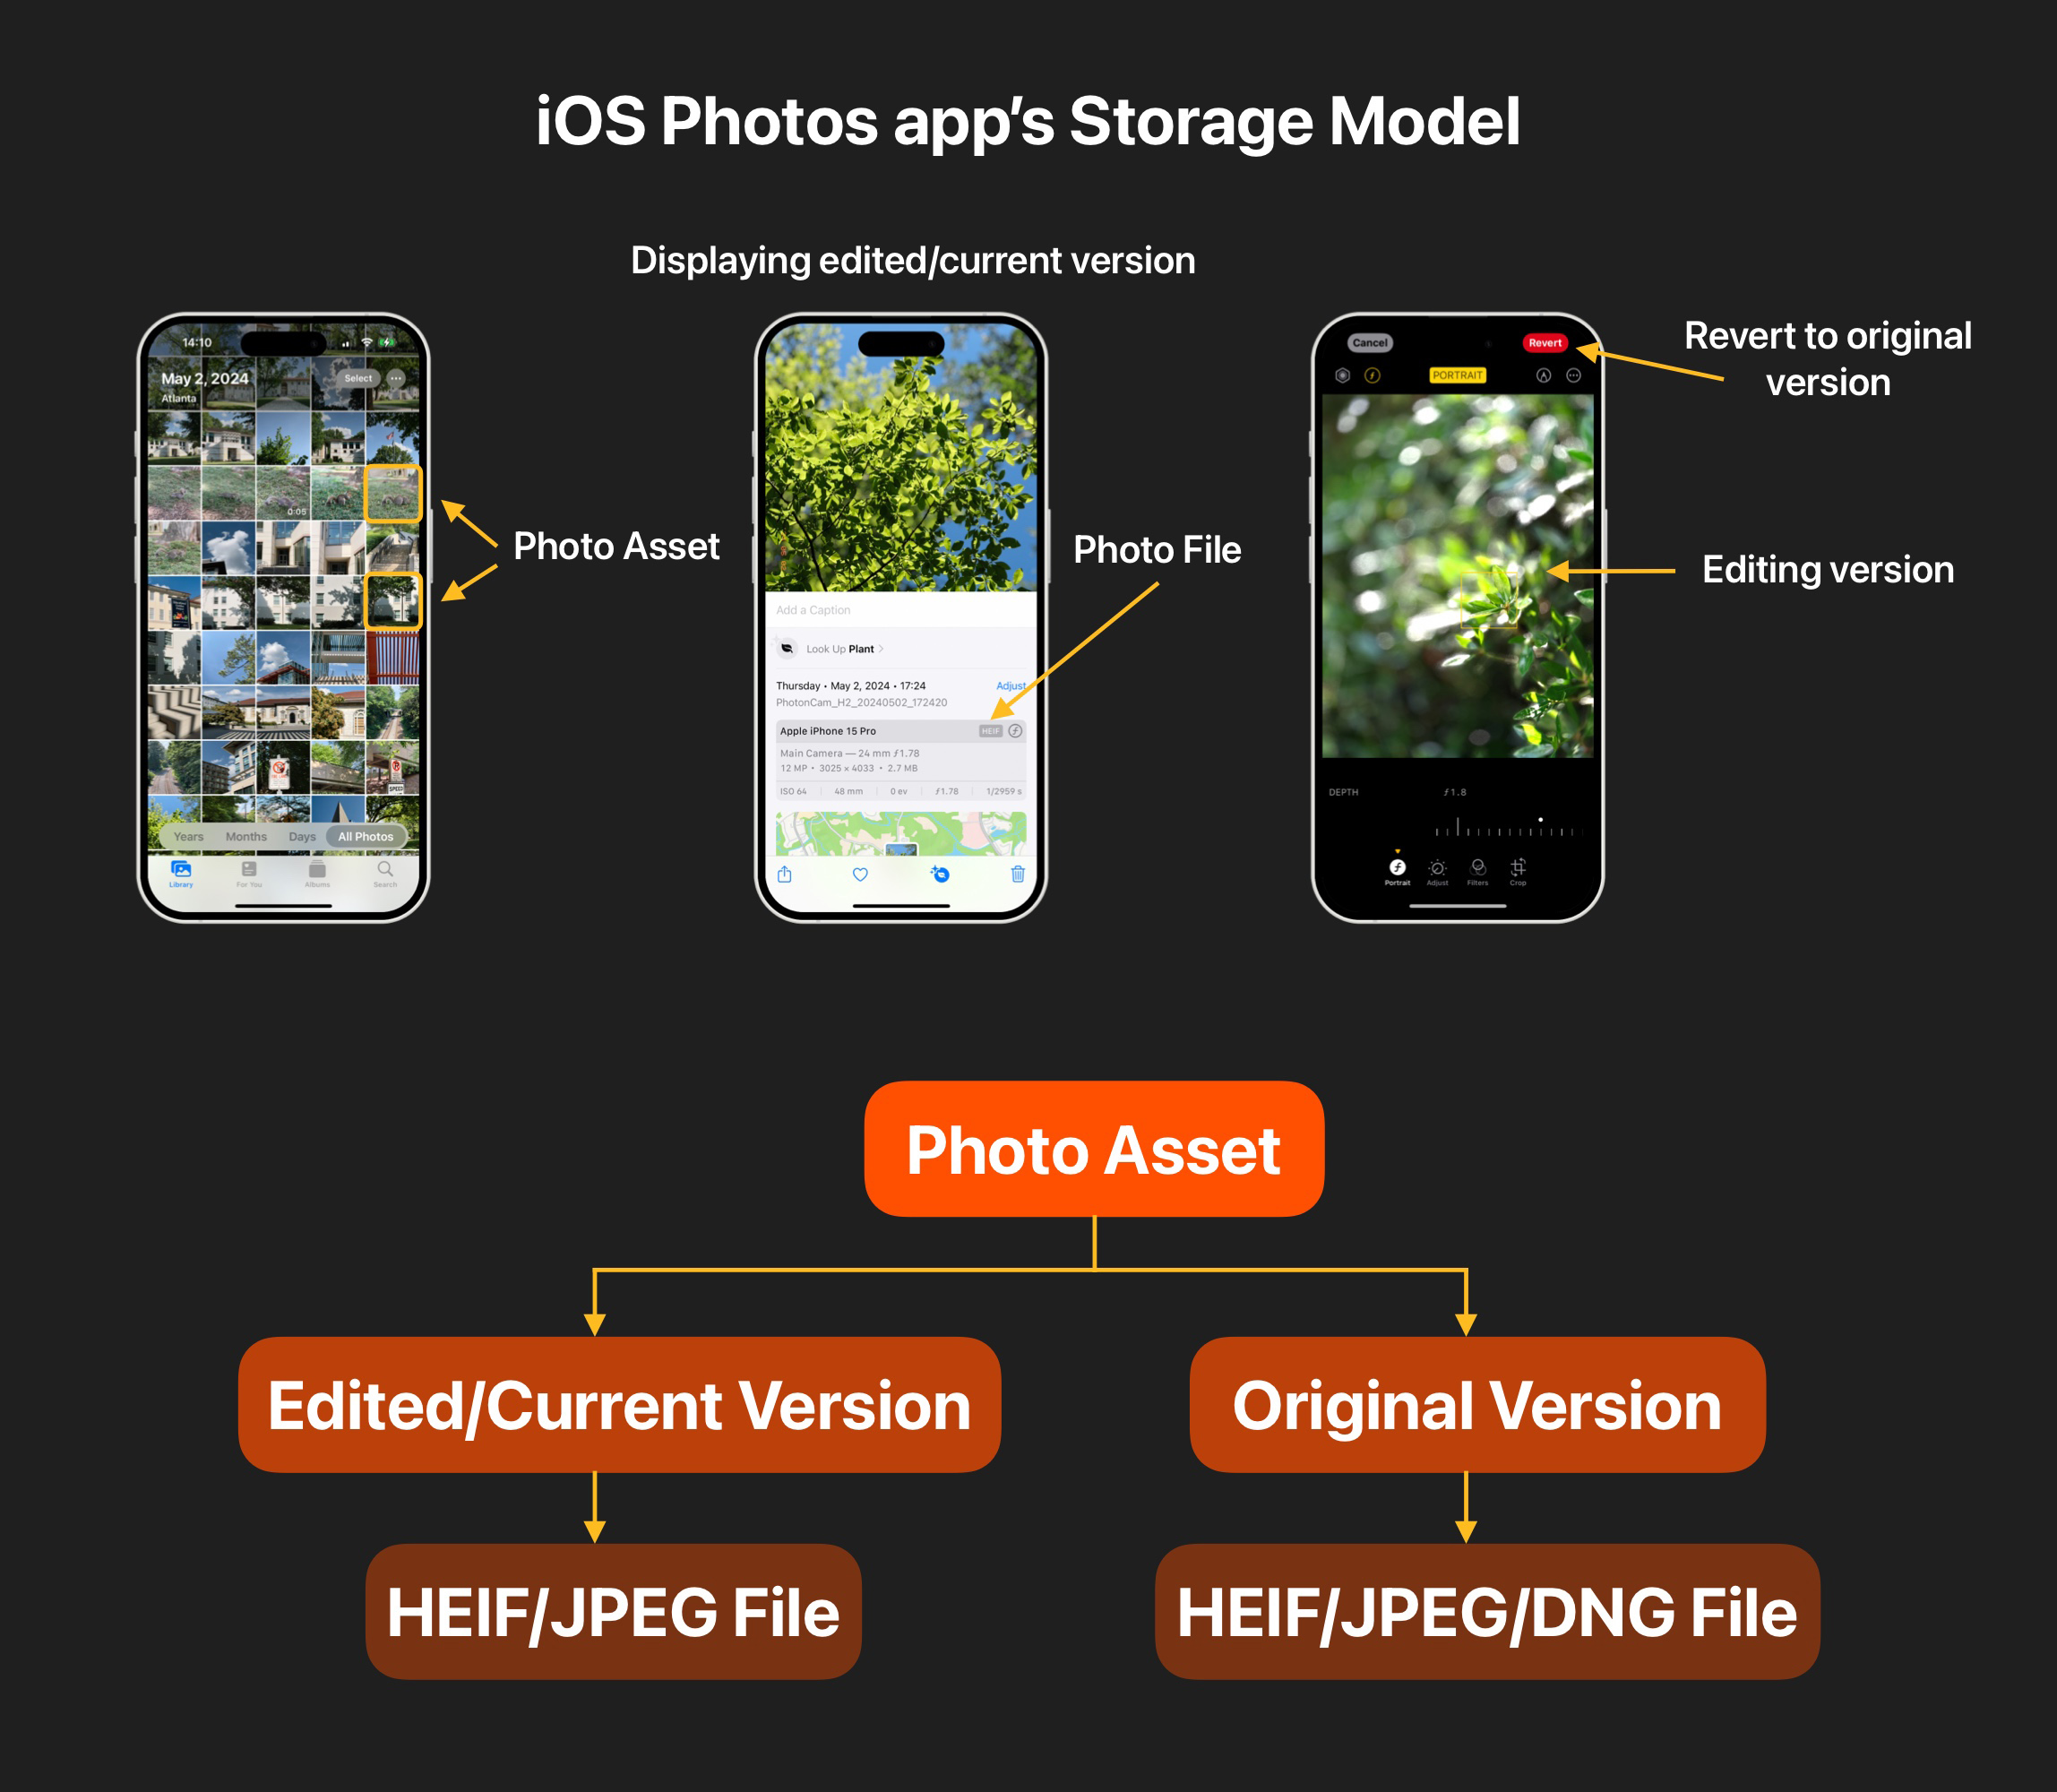
On a computer, what we see in Windows Explorer or macOS Finder are the photo files themselves. However, on iOS, we generally use the built-in "Photos app" to view the photos taken with the camera app—but it's worth noting that although every photo we see corresponds to a photo file, in the "Photos app," behind each photo, there may be multiple photo files.
Does the above statement sound a bit convoluted? Actually, it's clear once you understand a few concepts:
- Photo Asset: The individual photos in the "Photos app," a photo asset can contain one or more photo files.
- Photo File: The actual photo file itself. When we open a photo in the "Photos app," the large photo we see is displayed by decoding a photo file.
- Photo Version: After you edit a photo through the "Photos app," the system generates an "edited/current" version of the photo version, and later you can "revert" the photo to the "original version." Each photo version itself corresponds to a photo file.
The following diagram can help you understand more intuitively:

Although the above concepts are actually a bit complicated for users, the iOS system (accurately speaking, the Photos app) has tried to hide these details as much as possible. If you are interested in more details, you can continue reading the following text.
Below, some common scenarios will be introduced to explain what the photo storage model looks like.
Using the System Camera to Shoot and Save RAW Photos
In this case, a photo asset contains a RAW file, and the RAW file itself has a full-size HEIF/JPEG thumbnail. When viewing the large photo, the thumbnail inside is displayed.
When editing with the "Photos app," the RAW file is loaded for editing. The edited photo will be stored as a new HEIF/JPEG photo file, as a new "edited/current" version.
Using the System Camera to Shoot and Save Portrait Photos
When you shoot portrait photos, the system will:
- Save the HEIF/JPEG without portrait blur processing (which already contains depth data) as the "original" version in a photo asset.
- Save the HEIF/JPEG with portrait blur processing as the "edited/current" version When viewed in the system "Photos app," what is displayed is this "edited/current" version At the same time, you can switch between different versions by clicking the portrait mode switch in the upper left corner.
Using PhotonCam to Shoot and Save RAW Photos
PhotonCam has several options for ProRAW shooting:
- Whether to enable ProRAW.
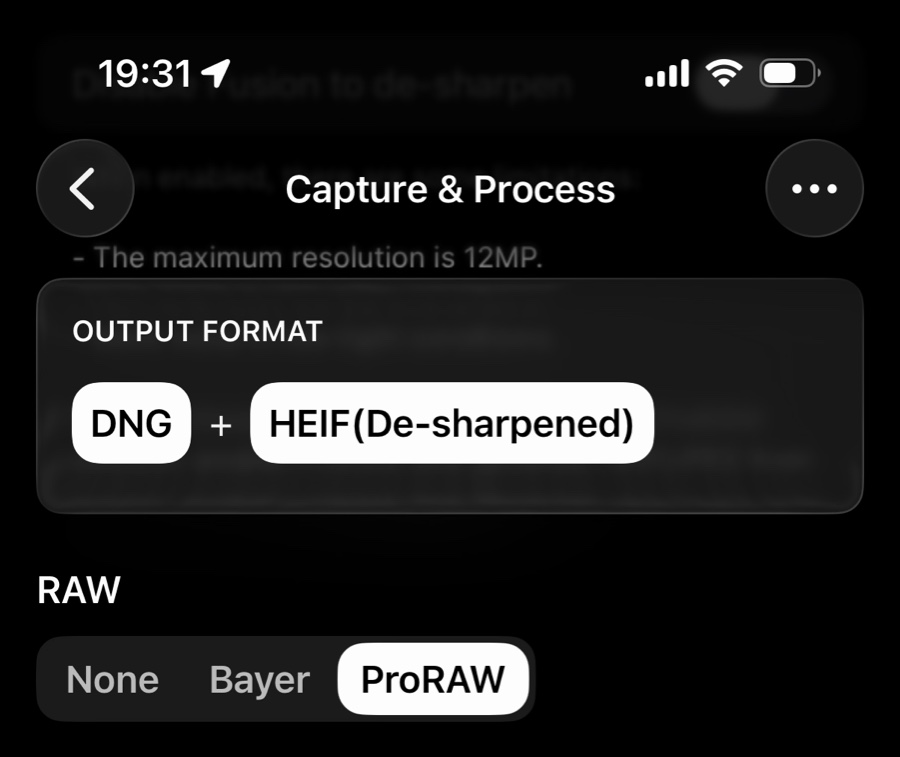
- Whether to use unmodified ProRAW to output HEIF/JPEG photos: If this option is not enabled, the iOS camera API will output both DNG and HEIF/JPEG files, and the HEIF/JPEG file here is the overly sharpened version often discussed. After enabling this option, PhotonCam will read the DNG file itself to output HEIF/JPEG, which will result in better-looking photos—but it will significantly increase the photo saving time.
- Save DNG or not: This option can be enabled only when "using unmodified ProRAW to output HEIF/JPEG photos" is enabled. When this option is enabled, the saved HEIF/JPEG is obtained by reading the DNG file itself, but the DNG file will not be saved—this can significantly reduce the storage space occupied.
Therefore, depending on the different options enabled, the photo asset will be stored in different forms. You can check them in the top of this page:

When there is a DNG file as the "original" version when you edit the photo asset through PhotonCam, the DNG file will be used by default for editing.
It should be noted that the DNG + HEIF photo assets stored by PhotonCam will always be displayed as JPEG + RAW in the upper left corner of the system "Photos app." This is an issue with iOS itself, and apps cannot handle it. Additionally, when viewing file size, the size of the "edited/current" version is displayed, not the size of the DNG file.
HEIF or JPEG?
Starting with iOS 11, Apple has supported the shooting, storage, and editing of HEIF (High-Efficiency Image File Format) photos. Photos taken with an iPhone are by default output in HEIF format, and as this format becomes more popular, most of our commonly used devices, including Android and Windows, can now display HEIF format photos normally.
Compared to the more common JPEG, HEIF achieves a better balance between compression rate, image quality, and file size. Additionally, HEIF also supports lossless formats (PhotonCam also allows you to set it to use lossless HEIF for saving). Therefore, unless you need to export photos to some relatively old devices for viewing, the author himself recommends using the HEIF format to save photos.
For more information, please see Wikipedia and Apple's video at WWDC.
ProRAW Related Processing Options
PhotonCam also provides several ProRAW-related processing options.
- ProRAW Sharpening Options
- ProRAW Color Depth
As mentioned earlier, when "ProRAW" and "using unmodified ProRAW to output HEIF/JPEG photos" are enabled, the saved photos themselves can already significantly reduce the sharpening issues caused by Deep Fusion. If you still think the photo sharpening is too strong, you can set the ProRAW sharpening options here.
The color depth of the ProRAW files shot with the iPhone is 10 bits or higher (iPhone 12 Pro and 13 Pro support 12 bits, subsequent Pro models support 10 bits). Higher color depth allows for more refined color storage but also requires more storage space. If you don't have high requirements for post-editing, you can reduce the storage space occupied by reducing the ProRAW color depth to 8 bits.
Multi-Frame Fusion Under Manual Exposure
By default, iOS uses multi-frame fusion processing. Therefore, when shooting with manual exposure, in order to make the exposure of the preview screen consistent with the actual shooting screen, iOS will enable multi-frame fusion technology, but the final output photo will not accurately use the ISO and shutter speed you set.
If you need precise control over ISO and shutter speed (to achieve shooting in some specific environments), then please disable the "multi-frame fusion under manual exposure" option.
Additionally, when "multi-frame fusion under manual exposure" is disabled and ProRAW shooting is enabled at the same time, the photos taken will be darker than the actual preview—this is an issue with iOS itself, and third-party apps including PhotonCam cannot solve it, please understand.