超谈 SwiftUI: Menu 下拉菜单的触控响应顺序问题和解决方案
背景和问题
在 SwiftUI 里,我们使用 Picker 或者 Menu 来实现一个选择器或者一个下拉菜单,这两者基本是一个东西,只是有一些 UI 细节上的区别(因此本文后续都会只用 Menu 来表示)。它们不是跟 Text 一样是纯 SwiftUI View,而是桥接到 UIKit 和 AppKit 的 SwiftUI View。具体为:
- 在 UIKit 上,等同于使用
UIButton+UIMenu - 在 AppKit 上,等同于
NSPopUpButton
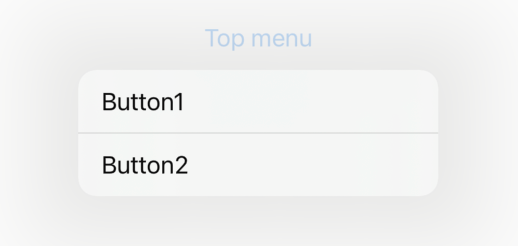
使用方法上很简单:
Menu {
    Button("Button1") {
        print("Clicked button 1")
    }
    Button("Button2") {
        print("Clicked button 2")
    }
} label: {
    Text("Top menu")
}
在 SwiftUI 上使用 Menu,可以自定义的样式**非常少。**当然这归咎于 SwiftUI 这一层暴露的可供定制的属性不是很多,如果你通过 Introspect 这个库拿到底下的 UIView/NSView,那么就可以随意发挥了——尽管这应该还有「统一设计」这样的考虑,但是在 macOS 上连非展开情况下的 Label,你甚至无法通过 SwiftUI 上层任何相关的方法来修改它的颜色,也是我想借机吐槽的一点。
那么这个 Menu 上有什么使用问题呢?咋一看其实没啥问题,点击 Menu 的 Label,显示一个 DropDown 样式的菜单,点击里面的按钮能触发事件,这个没问题。但如果这一个页面有其他 Button 呢?而这些按钮没有被这个 DropDown 样式的菜单挡住,那么能点击吗?
在不同场景下有不同的答案:
- 在 iOS 上,如果该页面有 SwiftUI 的 Button,那么这个按钮在 Menu 展开的情况下能被点击;准确来说,SwiftUI 下的 onTapGesture 能被响应
- 在 iOS 上,如果该页面有桥接 UIKit 上的 UIButton,那么这个按钮在 Menu 展开的情况下不能被点击
- 在 macOS 上,不存在该问题
因此,如果你有以下这么一个复杂的页面:

在菜单之外,还有一个能点击的列表,那么除非用户能够点击 Menu 中的 DropDown 下的按钮以及 Menu 自身的 Label,那么很大概率,用户可能会点击列表中的项目,然后跳转页面了。
分析
首先,我们需要知道,点击 Menu 的 Label,出现 DropDown 菜单的时候,UIKit 到底发生了什么事情。
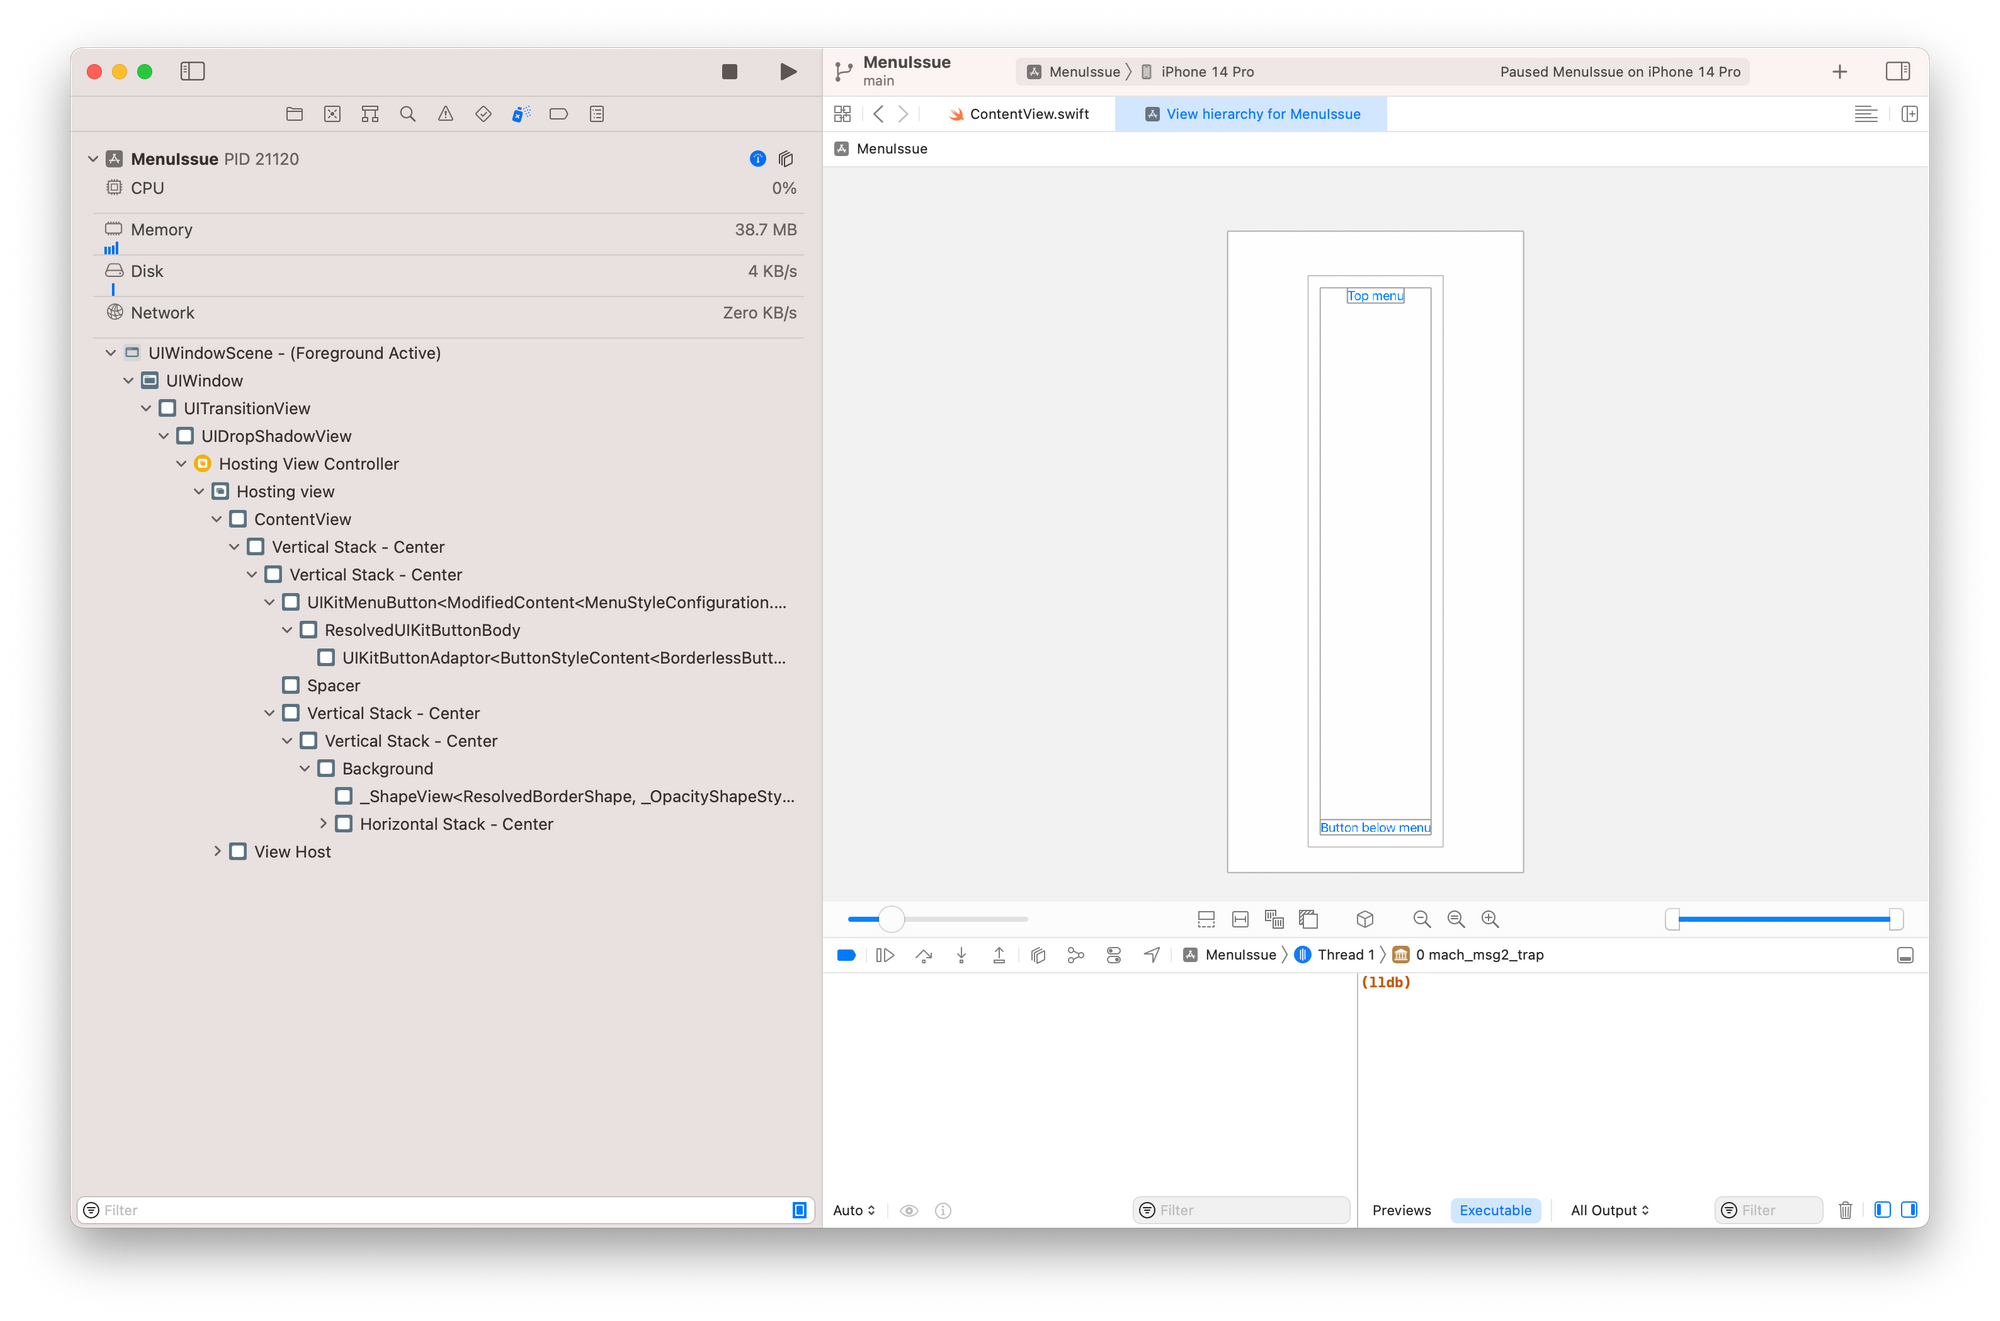
我们可以通过 Xcode 的 Debug View Hierarchy 功能来查看当前的布局。
对于以下的 SwiftUI 代码:
struct ContentView: View {
    var body: some View {
        VStack {
            Menu {
                Button("Button1") {
                    print("Clicked button 1")
                }
                Button("Button2") {
                    print("Clicked button 2")
                }
            } label: {
                Text("Top menu")
            }

            Spacer()

            Button("Button below menu") {
                print("Clicked button below menu")
            }
        }
        .padding()
    }
}
在运行后,初始状态下对应的 View Hierarchy 如下。整个 SwiftUI 的 View 被一个 HostingViewController 管理,而这个 ViewController 则被 UIWindow 管理。如果再深入下去查看,那么会发现底部的 Button,没有对应的 UIButton——SwiftUI 在 iOS 上的 Button,已经是完全自绘了,不桥接自 UIKit 了,这也是预期行为。
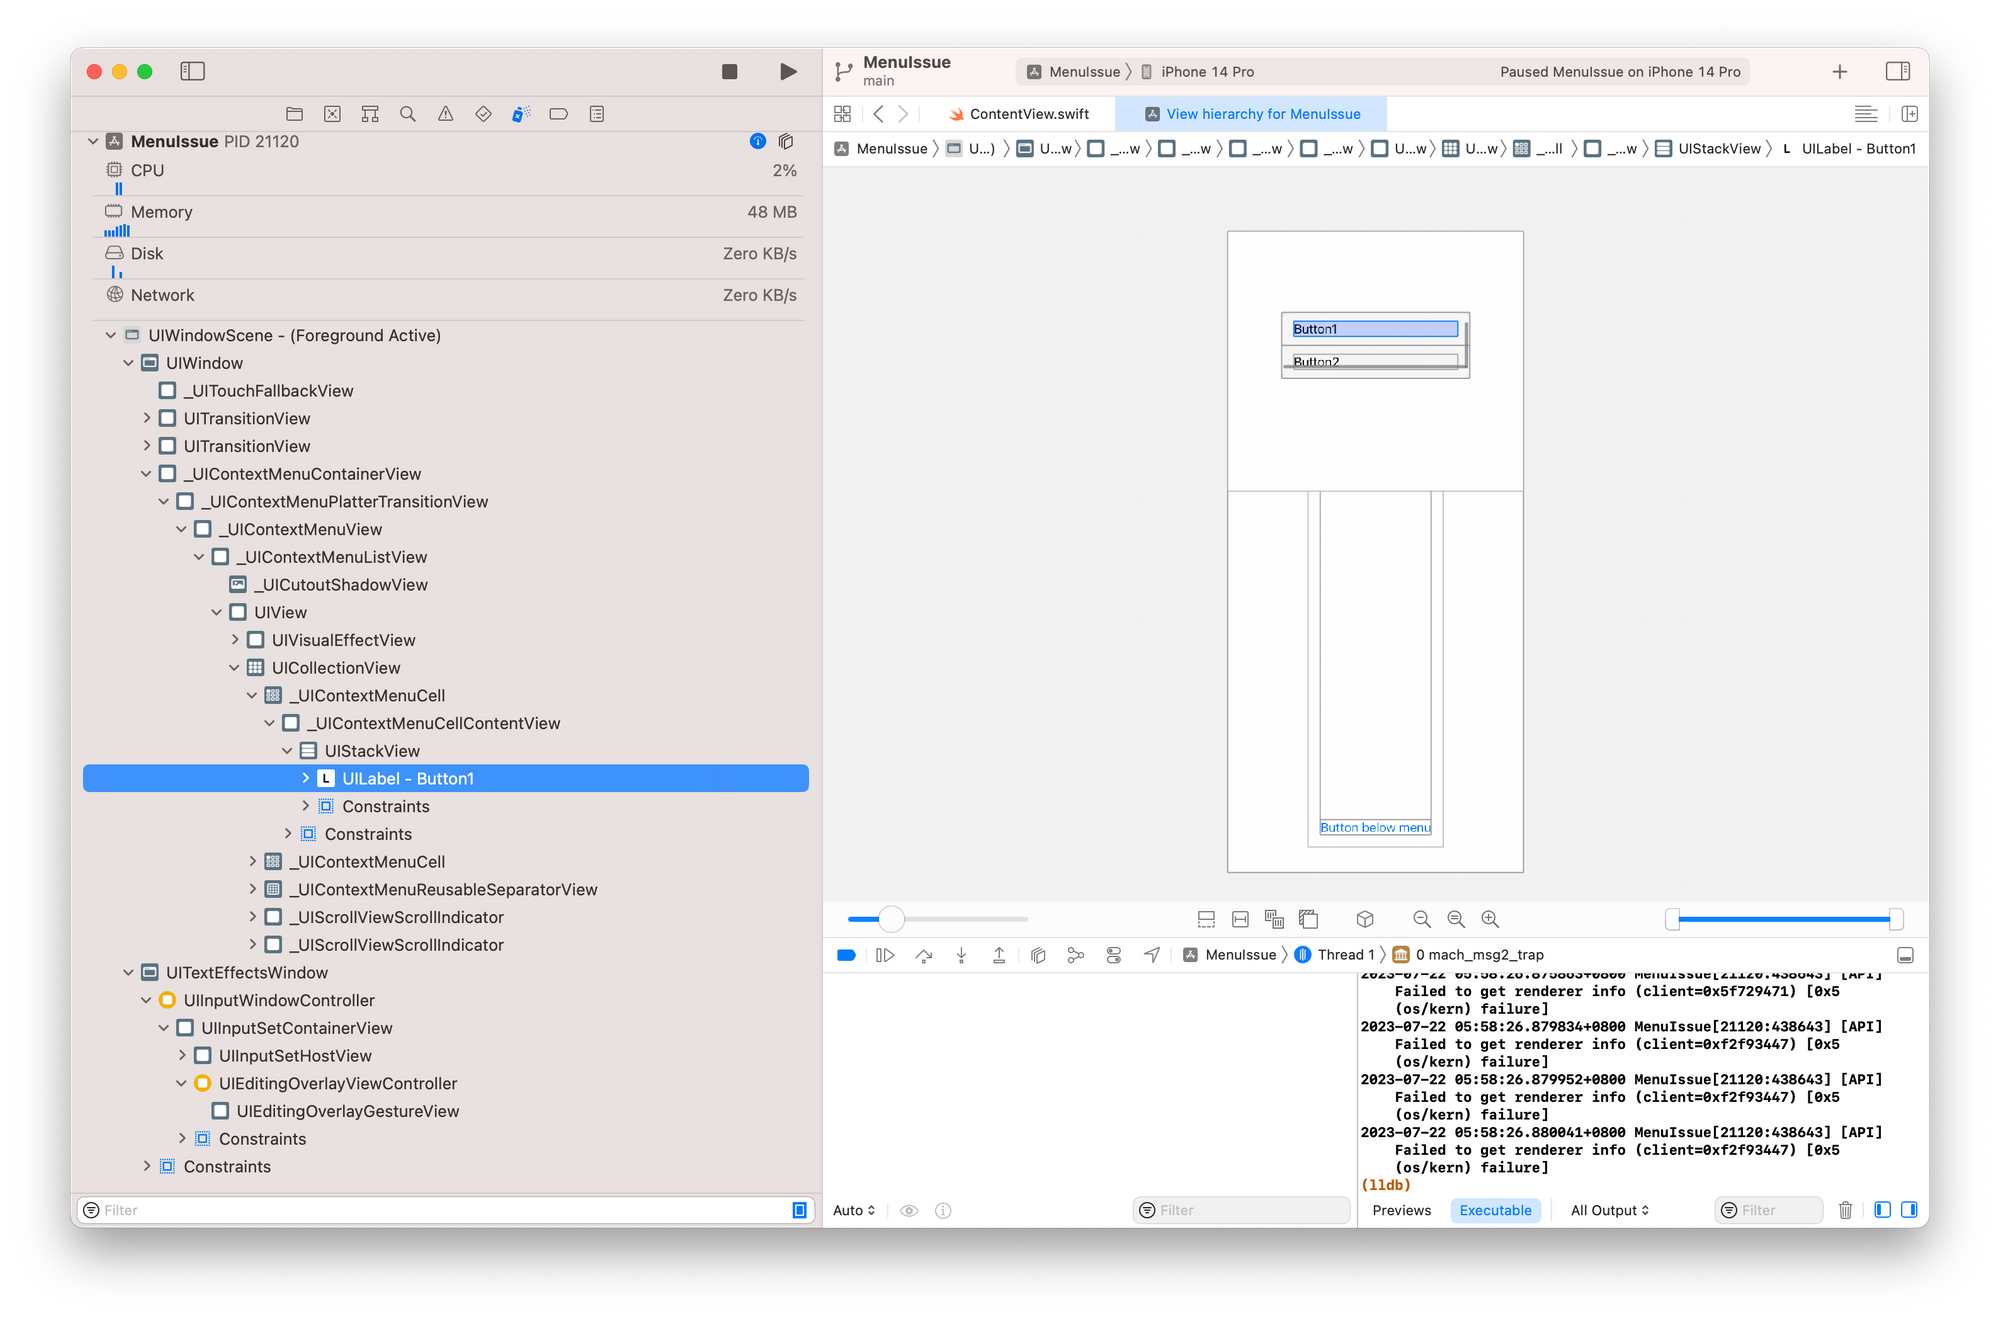
在点击 Menu 出现 DropDown 菜单后的 View Hierarchy 如下。可以看到,UIWindow 下的 subviews 多了好几个(甚至多了一个 UIWindow,但这个不是重点,这里先不探究),其中最上层的,是叫 _UIContextMenuContainerView,是一个 UIKit 内的私有类。而 DropDown 的按钮,都是这个 _UIContextMenuContainerView 的间接子 View,按钮列表本身使用了 UICollectionView + UIStackView 来布局。
从表现来看,可以猜到 _UIContextMenuContainerView 并不会去直接响应触控事件。实验了下,在 DropDown 菜单出现的时候,通过点击菜单的背后的区域(不论底下点中的是 SwiftUI Button 或者是 UIKit UIButton),会发生以下事情:
- UIWindow 的 hitTest 会调用比正确返回所点击的 UIView
如果点击的是 SwiftUI Button(或者加了 TapGesture 的任何 View),那么会响应并消费点击事件,不往下一个 UIResponder 传递。如果点击的是 UIKit 的 UIButton(或者加了手势识别的任何 UIView),那么在 hitTest 调用后,就没有任何下文了——通过观察在 hitTest 被返回的 UIView,它的 next、isUserInteractionEnabled 等属性都是没问题的。
我这里猜测,在 hitTest 后的事件分发里,对已经出现 _UIContextMenuContainerView 的情况,UIWindow 或者是 UIView 内部的逻辑做了处理;虽然 SwiftUI View 的尽头一定也是一个 UIView(对于 Text 和 Button,则是一个名字带有 CGDrawingView 的 UIView,比如叫 _TtCOCV7SwiftUI11DisplayList11ViewUpdater8Platform13CGDrawingView),但在手势识别和处理上应该不是使用了 UIGestureRecognizer 了,所以没有涵盖一些原有在 UIView 上的情况。
解决方案
在知道发生了什么问题后,我们可以想想可行的解决方案,其中有:
- 在 SwiftUI 里,分别侵入 Menu 点击和 MenuItem 点击的处理:在点击 Menu 后,使用一个全屏的并吃掉手势的 Swift View 覆盖在原 View 只上。而 Menu 的容器
_UIContextMenuContainerView不管怎样,都会加载UIWindow的 subview 最后,所以不会被这个 View 覆盖。在点击 MenuItem 或者点击全屏覆盖 View 后,让这个全屏覆盖的 View 消失。 - Pros:可以直接在 SwiftUI 里实现
- Cons:对 Menu 点击和 MenuItem 点击需要侵入到使用处的各个地方;因为只能对点击进行处理,对于其他能让 Menu 消失的情况,无法覆盖(比如把 App 放到后台再回来)
- 监听
UIWindow的 subview 变化,在知道加入_UIContextMenuContainerView后,让UIWindow的其他子 UIView 无法响应交互(isUserInteractionEnabled设置为 false 即可)。 - Pros:解决方式最彻底,能完全解决此 Bug,同时对原 SwiftUI 的布局代码也无侵入
- Cons:需要侵入 App 的启动,需要继承
UIWindow,并对_UIContextMenuContainerView这个私有类进行检查;原 ScenePhase, onOpenURL 等方式需要手动处理。
由于第一种解决方案对解决 Bug 本身不彻底,所以接下来就不讨论此方案了,将会专注第二个方案的实现。
要实现方案二,我们需要:
- 实现一个类,继承
UIWindow,并在didAddSubview和willRemoveSubview里判断添加和移除的子 UIView 是否为_UIContextMenuContainerView,是的话则设置 UIWindow 其他子 UIView 的isUserInteractionEnabled为 false;值得注意的是:因为UIWindow的subviews属性不是 KVO-Compliant 的,我们无法通过 KVO 的方式来监听它的变化,从而不需要继承 UIWindow。 - 因为要用我们自己实现的
UIWindow实例,我们需要在UIWindowSceneDelegate的适当时机来构造这个UIWindow,并把原本的 SwiftUI View 放进去来显示;这里需要放弃原 SwiftUI 的App Protocol的使用,因为一旦使用了,内部就在启动的时候自动创建 UIWindow。 - 因为我们是自己来实现
UIWindowSceneDelegate,原来的ScenePhase的EnvironmentValue已经不会分发了,需要我们手动分发处理。
以下为具体的实现。
继承 UIWindow
首先是定义一个 UIWindow 的子类,并 override didAddSubview 和 willRemoveSubview 的实现 :
fileprivate class AppUIWindow: UIWindow {
    override func didAddSubview(_ subview: UIView) {
        super.didAddSubview(subview)

        // _UIContextMenuContainerView will be added as the subview of the view in this UIWindow.
        // But it doesn't block the touch event. So we set other views behind it uninteractable.
        runWithOtherViews(except: subview) { v in
            v.isUserInteractionEnabled = false
        }
    }

    override func willRemoveSubview(_ subview: UIView) {
        super.willRemoveSubview(subview)

        runWithOtherViews(except: subview) { v in
            v.isUserInteractionEnabled = true
        }
    }

    private func runWithOtherViews(except subview: UIView, block: (UIView) -> Void) {
        if type(of: subview) == NSClassFromString("_UIContextMenuContainerView") {
            self.subviews.filter { $0 != subview }.forEach { v in
                block(v)
            }
        }
    }
}
在 didAddSubview 和 willRemoveSubview 的实现里,我们检查当前的 subview 的类名字是否叫 _UIContextMenuContainerView 。因为这是一个内部的类,我们不能使用 _UIContextMenuContainerView.self 来获取它的 Type,需要用到 NSClassFromString。
对于 UIWindow 的其他处理,我们不做修改——当然,你可以 override hitTest 的方法,来监听事件分发之前的 hitTest 处理。
实现 AppDelegate 和 UIWindowSceneDelegate
接下来,我们需要删掉原 SwiftUI 的 App Protocol 的实现,实现自己的 UIApplicationDelegate 和 UIWindowSceneDelegate。
对 UIApplicationDelegate,我们需要做的是能让我们的 UIWindowSceneDelegate 来处理 Scene 的生命周期:
@main
class AppDelegate: UIResponder, UIApplicationDelegate {
    func application(
        _ application: UIApplication,
        configurationForConnecting connectingSceneSession: UISceneSession,
        options: UIScene.ConnectionOptions
    ) -> UISceneConfiguration {
        let sceneConfig = UISceneConfiguration(name: nil, sessionRole: connectingSceneSession.role)
        sceneConfig.delegateClass = AppSceneDelegate.self
        return sceneConfig
    }
}
在这里,我们需要使用 @main 来标记此作为 App 的入口点。
在 App 启动的时候,会调用上述代码的 application(_:configurationForConnecting:options:) 方法,来获取一个 UISceneConfiguration,这里我们设置 delegateClass 为一会我们即将要实现的 AppSceneDelegate 。当然,让 App 使用特定的 UIWindowSceneDelegate 并不只有这一种方法,你可以在 Info.plist 里进行设定,具体方法请自行查询。
💡当然,如果你的 SwiftUI app 本身就支持在 Mac 上运行,你需要做一些手段来区分两个平台来做不同的处理。这里就不展开,有兴趣也可以翻一下我之前的关于 MenuBar app 实现的博客。
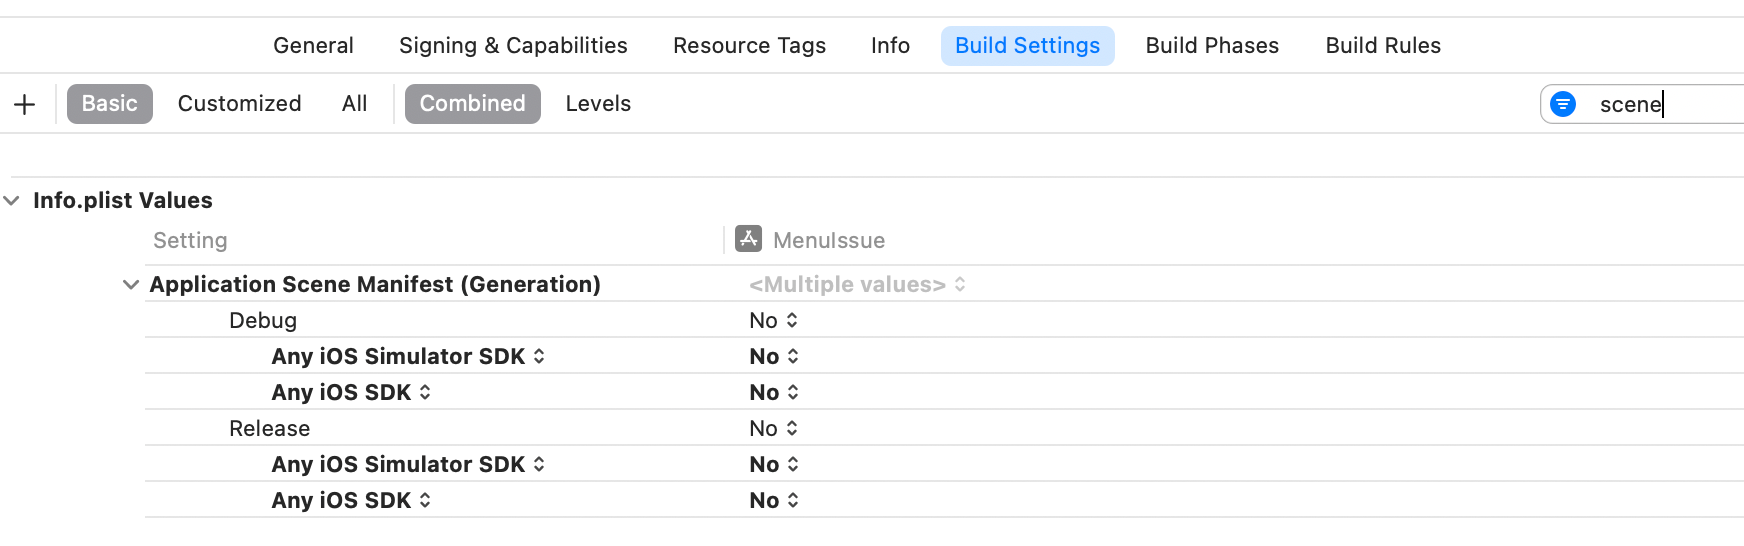
这里有一个小提示:如果你的 App 新建的时候,就是使用 App Protocol 的 SwiftUI app,那么你需要到如图下面的地方,设置不去生成 Application Scene Manifest,这样 application(_:configurationForConnecting:options:) 方法才会得到调用。
接下来实现我们的 UIWindowSceneDelegate,并在里面创建我们自己的 UIWindow 实例,并加载 SwiftUI View。
fileprivate class AppSceneDelegate: UIResponder, UIWindowSceneDelegate {
    var window: UIWindow?

    func scene(_ scene: UIScene, willConnectTo session: UISceneSession, options connectionOptions: UIScene.ConnectionOptions) {
        guard let windowScene = (scene as? UIWindowScene) else { return }

        let controller = UIHostingController(rootView: ContentView())

        let window = AppUIWindow(windowScene: windowScene)
        window.rootViewController = controller
        self.window = window

        window.makeKeyAndVisible()
    }
}
一些原本在 App Protocol 实现里初始化的 State 和 StateObject,你需要移步到 ContentView 内部去做。你可以创建一个 ContentView Wrapper,在里面去初始化 State 和 StateObject 。又或者,对这些跟 Scene 绑定的 App 状态,你可以在创建 Scene 的时候去创建,然后在 Scene 销毁的时候销毁。
处理其他事件
在 SwiftUI 中,我们可以通过监听 @Environment(\.scenePhase) 以在 Scene 的激活状态发生变化的时候做响应的处理:
struct ContentView: View {
    @Environment(\.scenePhase) private var scenePhase

    var body: some View {
        VStack {
            /// ...
        }
        .padding()
        .onChange(of: scenePhase) { newValue in
            // todo
        }
    }
}
因为我们自己实现了 UIWindowSceneDelegate 的缘故,我们需要手动分发并改写 scenePhase 环境值来让原来的 View 能正确使用 @Environment(\.scenePhase) 来接收 Scene 生命周期的变化。
首先定义一个用于发布信息的 ObservableObject:
class AppSceneEventPublisher: ObservableObject {
    @Published var phase: ScenePhase = .inactive
    @Published var openURL: URL? = nil
}
回到我们自己的 UIWindowSceneDelegate 实现:
fileprivate class AppSceneDelegate: UIResponder, UIWindowSceneDelegate {
    var window: UIWindow?

    private let publisher = AppSceneEventPublisher()

    func scene(_ scene: UIScene, willConnectTo session: UISceneSession, options connectionOptions: UIScene.ConnectionOptions) {
        /// ...
    }

    func sceneDidBecomeActive(_ scene: UIScene) {
        publisher.phase = .active
    }

    func sceneDidEnterBackground(_ scene: UIScene) {
        publisher.phase = .background
    }

    func sceneWillResignActive(_ scene: UIScene) {
        publisher.phase = .inactive
    }
}
在 sceneDidBecomeActive 等地方,分别设置 AppScenePhase 的 phase 属性。现在你可以在创建你的 SwiftUI View 的地方,把这个 AppScenePhase 注入环境 .environmentObject(scenePhase) 了,然后在子 View 里去获取这个 EnvironmentObject 。当然,为了能让子 View 能继续使用 @Environment(\.scenePhase) 来接收 Scene 生命周期的变化,我们需要复写这个环境变量的值:
fileprivate struct MainRootView: View {
    @EnvironmentObject private var scenePhase: AppScenePhase

    var body: some View {
        MyContnetView()
	        .environment(\.scenePhase, scenePhase.phase)
    }
}
同样地,我们需要在 scene(_:openURLContexts:) 里处理 URL 的分发:
func scene(_ scene: UIScene, openURLContexts URLContexts: Set<UIOpenURLContext>) {
     if let first = URLContexts.first?.url {
        publisher.openURL = first
     }
}
实现自己的 CustomOpenURL ViewModifier:
struct CustomOpenURL: ViewModifier {
    @EnvironmentObject var scenePhase: AppSceneEventPublisher

    let action: (URL) -> Void

    func body(content: Content) -> some View {
        content.onReceive(scenePhase.$openURL) { output in
            if let url = output {
                action(url)
            }
        }
    }
}

extension View {
    func onCustomOpenURL(action: @escaping (URL) -> Void) -> some View {
        self.modifier(CustomOpenURL(action: action))
    }
}
这样在使用的地方,就可以使用 onCustomOpenURL 来处理打开 URL 的事件了:
var body: some View {
    ContentView()
        .onCustomOpenURL { url in
            // todo
        }
}
到此位置,此解决方案的实现已经完成。在使用 Menu 和 Picker 的地方,不需要再做特别的处理,就能正确处理展开 DropDown 菜单时候的触控响应问题了。
后记
如果你有关注我之前的文章,为了能实现一个 MenuBar only 的 app,并向下兼容到 macOS 12.0(意味着不使用 macOS 13.0 的 MenuBarExtra ),我针对 Mac 平台,也是抛弃了 App Protocol,来通过自行管理 NSWindow 的方式来实现窗口管理,并在里面显示使用 SwiftUI View。
在解决此文提及的 bug 后,现在我的 Photon AI Translator 已经完全放弃 App Protocol 了——这点真的很可惜。UIKit 和 AppKit 原有的 App 启动方式还是有点复杂(当然,是指抛弃使用 Storyboard 的情况下),SwiftUI 的 App Protocol 的方式很优雅,但也仅仅在没有出严重 Bug 的情况下。
写 SwiftUI app 已经有一年多,在写本文的时候,还是再次感叹:真的希望有朝一日 Apple 能好好地修理这些细碎但是也是挺影响用户体验的 Bug(关于 Sheet 的也有坑,文章还在撰写中,但有些细节还在搞明白当中),并让这些修复能往下兼容到老的系统中。否则,SwiftUI 开发的时候依然挣脱不了对 UIKit 和 AppKit 的了解和侵入。
Subscribe to JuniperPhoton's Blog
Get the latest posts delivered right to your inbox